Remove Grease and oil residue. Be sure to utilize the correct abrasive to achieve the required finish. Inspect the parts for imperfections before hand.
Abrasive blasting is critical to establishing a solid foundation.
It's important that you take Compressed Air Capacity & Equipment into consideration. Are you using a pressure system or a suction system? Are you utilizing a Dust Collector?
Choose the right abrasive for the job. Choosing the incorrect abrasive will guarantee a inconsistent finish.
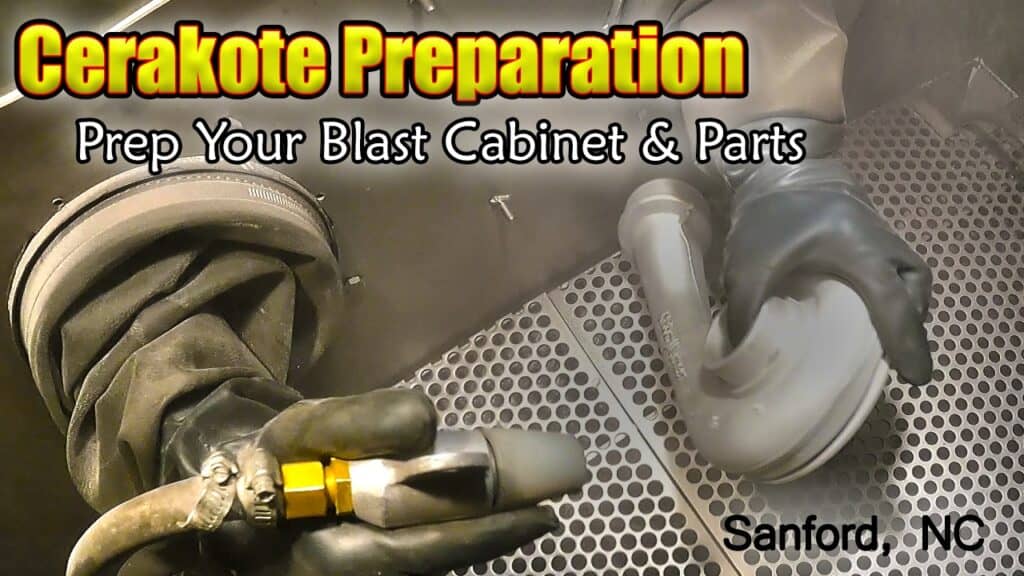
Learn how to properly prepare your parts for Cerakote application. Surface preparation is key to achieving optimal results. Clean and inspect your parts, achieve the proper surface finish through abrasive blasting, and choose the right abrasive for the job. Watch our video for a first-hand look at the process.
Securing a skilled Cerakote is undoubtedly vital, as entrusting your parts to the right individual or company can make all the difference in the outcome. However, the significance of meticulous surface preparation cannot be overstated. It is often said that the preparation process contributes a staggering 95%-plus towards the overall quality of the finished product. This underscores the importance of ensuring that your parts undergo thorough and precise preparation before Cerakote application.
So before Cerakoting, or prior to sending your parts out for Cerakote, it is crucial to understand what to avoid to ensure optimal results.
Here are a couple of key considerations:
You can also check out our Cerakote pre-preparation YouTube video for a first-hand look at blast cabinet and part prepping!
Today, our focus is going to be on achieving the proper surface finish for Cerakote application, primarily through abrasive blasting or media blasting, commonly referred to as sandblasting. This step is critical as it establishes the foundation for the adhesion and longevity of the coating.
We will discuss the equipment, abrasive, and the process of blasting your parts before Cerakote.
I have visited several manufacturers and coaters utilizing a spectrum of abrasive blast equipment, ranging from basic box store cabinets costing a couple hundred dollars to industrial-grade blast cabinets, blast rooms, and even wheel blast systems (AKA airless blasting systems). Your equipment selection is not only influenced by your budget but also by the quality of the abrasive you will use, which is closely tied to the quality of your equipment and its components. We will explore this further when we discuss abrasives.
Compressed Air Capacity & Equipment: How much compressed air do you have available for the abrasive blast process? This is often an overlooked factor when customers are deciding on their equipment investments. A manual blast cabinet typically has a lower demand for compressed air, as it only needs to supply a single blast nozzle.
When deciding between suction or pressure systems, it is crucial to weigh the options. Pressure cabinets require more air, but they are four times faster than suction cabinets. This means that while using a suction unit may require more labor, opting for a pressure system results in significantly quicker blasting. Additionally, you’ll need to consider factors such as media breakdown rates, energy consumption, and waste disposal. Understanding the overall cost of your process is crucial for determining the most effective way to proceed.
Once you’ve decided on the type of media delivery system you’ll use (pressure or suction), the most critical factor for me is the efficiency of the machine, particularly the reclaimer unit. Whether you’re utilizing a blast cabinet, automation setup, or a blast room, I firmly believe that Empire Abrasive Equipment systems provide the best value for your investment. Not only are they industrial-grade and ergonomically designed for longevity, but they also boast industry-leading media recovery systems, known as reclaimer, ensuring maximum efficiency and cost-effectiveness.
If you are familiar with a reclaimer, it’s the component situated on your pot or hopper, tasked with cleaning and segregating good abrasive from dust and fines. The reclaimed media is directed back into the hopper or pot for reuse, while the dust and fines are extracted from the machine to a dust collector. Usually, a screen is installed above the pot to capture any heavy debris that might fall from the reclaimer.
Why the Reclaimer is Your Blasting BFF
The reclaimer isn’t just another piece of equipment in your blasting operation; it’s your best friend! Here’s why:
Another crucial factor in selecting your abrasive blast equipment is the dust collector. Each Empire Abrasive Equipment cabinet is outfitted with the appropriately sized dust collector for its blast enclosure. Working in tandem with your cabinet’s reclaimer, the dust collector efficiently pulls dust and fines out of your working mix.
Opting for an Empire Blast Room offers additional benefits: alongside the enclosure’s dust collector, the recovery system boasts its own dust collection system. This setup ensures comprehensive dust management: while the enclosure dust system extracts dust within the blast room, the recovery system’s collector can simultaneously clean your media for reuse.
So, if your focus is on efficiency and quality, I cannot overemphasize the importance of investing in a blast system equipped with a high quality reclaim unit and dust collector, such as those manufactured by Empire Abrasive Equipment. This equipment will not only improve costs but also reduce part contamination, potentially eliminating other costly cleaning processes such as touch-up blasting, excessive air cleaning, and baths.
Choosing the right abrasive goes hand-in-hand with a good reclaimer. This powerful combo delivers consistent, repeatable blasting across your parts, paving the way for a flawless Cerakote finish. But the benefits extend beyond aesthetics; it also helps you understand your pre-coat costs better. This knowledge becomes a valuable asset if you ever consider outsourcing surface preparation to Rodeco Metal Finishing. With clear cost data in hand, negotiating per-part pricing becomes a breeze, allowing you to make informed decisions about your Cerakote workflow.
The Debate Heats Up: Choosing the Right Cerakote Abrasive
Many Cerakoters, myself included, have pondered the perfect pre-Cerakote abrasive. We all likely started with a web search: “Best abrasive for Cerakote?” And let’s be honest, aluminum oxide in 100 or 120 grit is a common answer, and for good reason!
Aluminum oxide offers several advantages: speed, consistency, and a clean finish – all ideal for Cerakote. However, after years in the business, I’ve explored some exciting alternatives that are just as cost-effective, if not more. And no, I’m not referring to that “proprietary blend of exotic steel media” that some equipment manufacturers claim is the greatest thing since sliced bread (In my opinion, those metallic products don’t have the bite, or retain the bite necessary to achieve the desired finish for Cerakote.) Anyway, here are a few excellent options for abrasives you can use to prep your parts for Cerakote (all in 100 – 120 grit):
Aluminum Oxide: Aluminum Oxide has long been the preferred media for serious Cerakoters and is likely to remain so for years to come. It not only cuts very quickly, which is crucial for parts requiring coating removal and surface preparation, but it can also be reused multiple times with an efficient recovery system. However, the price of aluminum oxide per pound can be relatively high, depending on what you are accustomed to paying for abrasive, and pricing can fluctuate depending on availability. Additionally, many suppliers may impose tariff charges due to importing the media.
ZirGrit AZ: Not many coaters or blasters are familiar with this product, as it is relatively new to the industry. My first encounter with it was a test a few years ago, and I must say, I was thoroughly impressed. The surface preparation and coating removal speed were as good as or even faster than aluminum oxide, but what really stood out to me was how clean the finish came out, and with much less dust.
ZirGrit AZ is an exceptionally durable media, which means it doesn’t break down as quickly as other abrasives, resulting in significantly less dust. This translates to better visibility in your cabinet, reduced waste, lower disposal costs, and a longer lifespan compared to aluminum oxide. So, what is the catch? Well, it does come at a higher price per pound. Notice, I said price, not cost.
Remember when I mentioned “understanding your per part cost for surface prep”? Well, to make an informed decision about switching to a product like ZirGrit AZ, you’ll need to thoroughly understand your process from start to finish.
You get the point – understanding the nuances of your blasting process is key when considering a switch to a different abrasive like ZirGrit AZ.
ZirGrit AZ can be a fantastic alternative to Aluminum Oxide, potentially offering better results and saving you money. However, there are a few situations where Aluminum Oxide might still be the better choice, at least until you make some equipment upgrades:
In the above situations, you won’t reap the full benefits of ZirGrit AZ’s extended lifespan. Leaks and deficiencies in your blast system can lead to significant media loss, negating its cost-effectiveness.
10X EpiX-MP Abrasive: If you have been in the coatings industry for a while, you might have come across 10X’s superoxalloy abrasive in the past few years. This engineered blasting abrasive has been steadily replacing Garnet, Slags, and Crushed Glass in shipyards and military bases. What you may not know is that many gunsmiths have been using a product called EpiX-MP from 10X Engineered Materials for years. Not only does it remove existing Cerakote better than other abrasives, but it is also an excellent option for surface preparation.
I have used 10X Engineered Material Abrasive for years and can attest that it removes coatings faster than any other abrasive, while also delivering a very white and clean finish. Besides its speed, one key observation is that with abrasives like Aluminum Oxide and especially Garnet, the finish on your metal surface tends to be closer to a light brown. However, with the 10X superoxalloy class of abrasives, you achieve an extremely clean, white metal finish. I know there are a few media manufacturers that may disagree with me on this, so I encourage you not to take my word for it. Instead, blast a few of your parts with each abrasive and examine the finish yourself. Alternatively, you can send us your parts, and we will test and return them to you for inspection.
Abrasives to Approach with Caution:
While we’re always exploring new possibilities, here are some abrasives to approach with caution for Cerakote prep based on our current experience:
In the meantime, here’s a look at the abrasive to avoid:
Metallic Abrasives / Shot & Grit: There are rumors that some companies are suggesting “proprietary shot/grit blends” for the pre-coat process. However, based on Cerakote’s recommendation of a 100 – 120 grit Aluminum Oxide profile, these blends will not achieve the necessary surface finish. Since steel shot is spherical, it lacks the “teeth” needed for this process. Although steel grit is angular, the particles round out to a similar shape as steel shot after multiple passes. One main advantage of steel media is its reusability, but if your abrasive rounds out, you won’t maintain a proper working mix to achieve the required profile.
One-and-Done Abrasives: One-and-done media options like Crushed Glass and Coal Slag lack the durability needed for recycling in cabinets or blast rooms, and they tend to introduce excessive dust into the process. And, in the interest of worker safety and environmental protection, silica sand is not recommended due to its respiratory dust hazards.
Garnet Abrasive: When reviewing the Cerakote Resource section, I was surprised to see Garnet listed as an approved abrasive for Cerakote surface preparation:
“We highly recommend using only #100 grit Aluminum Oxide or Garnet Sand; either will give the substrate a properly blasted profile for Cerakote application and performance”
Garnet can be purchased in a 120 grit/mesh size, providing a surface profile of 1.0-2.0 mil. However, unlike Aluminum Oxide and ZirGrit AZ, Garnet breaks down very quickly. This results in excessive dust in your blast system and requires frequent media replenishment to maintain an appropriate working mix. Therefore, similar to the one-and-done abrasives, I would not recommend using Garnet for a pre-Cerakote blast process.
Cerakote Prep: A Final Checklist for Success
Proper preparation is key to achieving optimal results. And for all Cerakote enthusiasts, feel free to share any additional tips for this ongoing discussion. Be sure to check back regularly on Rodeco for the latest updates and information regarding the new abrasive tests we have conducted.
We are continuously striving to expand our knowledge and provide valuable insights into the world of abrasives, so stay tuned for more exciting developments. Your feedback and engagement are always appreciated as we work together to enhance our understanding of surface preparation techniques.
And before we say goodbye, let’s solidify your Cerakote prep knowledge with some key takeaways:
Cerakote Prep: Quick Tips for Success
Here are some key points to remember when prepping your parts for Cerakote: